Jump to
- Overview
- Teachers
- Groups
- Students
- Copying Students and Groups into a Teacher’s account
- What teachers see
- Troubleshooting
Managing your School
Overview
If your school is on a School plan, one or more staff members are set up as School Admins. School Admins see 🏫 Manage School at the bottom of the sidebar. It has three tabs:
- Teachers: add and remove the teachers on your School plan.
- Groups: set up school-wide groups, like homerooms or intervention groups.
- Students: keep a school-wide student roster, then copy students and groups into each teacher’s account.
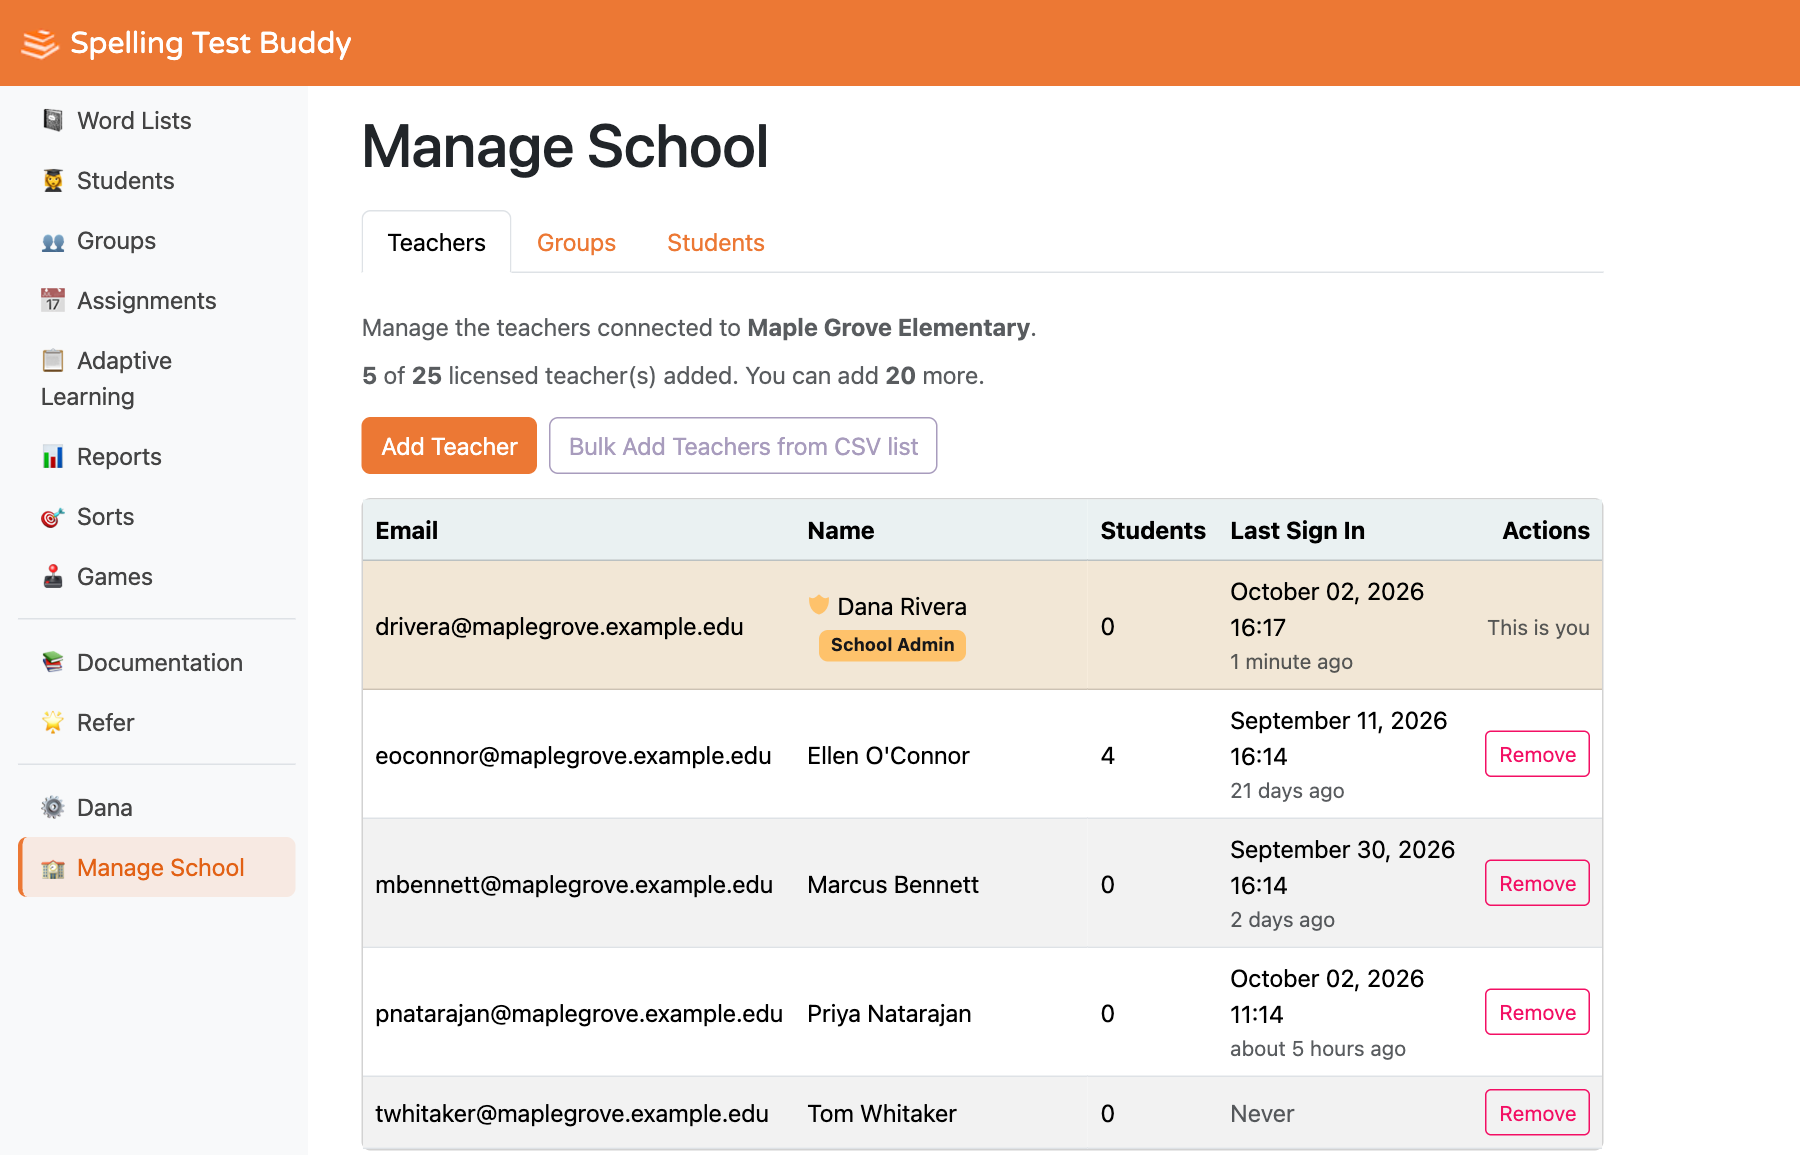
Don’t see Manage School? Only School Admins can see it. To make someone a School Admin, email us at support@spellingtestbuddy.com. Manage School is also hidden while you’re co-teaching in another teacher’s classroom.
Teachers
The Teachers tab lists every teacher on your School plan, with their email, name, how many students they have, and when they last signed in. School Admins are highlighted with a School Admin badge.
If your plan covers a set number of teachers, you’ll see how many seats are used and how many are left, for example “5 of 25 licensed teacher(s) added.” Once every seat is used, the add buttons are turned off. Email us if you need more seats.
Adding a teacher
- Go to Manage School and open the Teachers tab.
- Click Add Teacher.
- Enter the teacher’s first name, last name, and email address.
- Click Add Teacher.
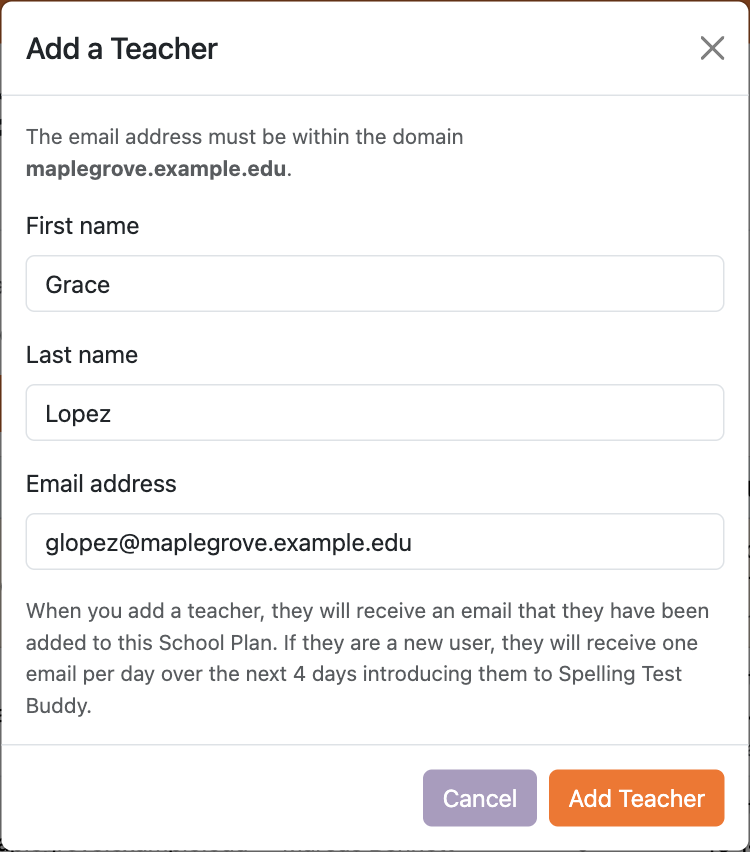
If your school is set up with an email domain (such as yourschool.org), the teacher’s email address must use that domain. The form shows which domains are allowed.
Here’s what happens next:
- If the teacher is new to Spelling Test Buddy, we create their account and send them an email saying they’ve been added to your School plan. Over the next 4 days, they’ll also get one short email a day introducing Spelling Test Buddy.
- If the teacher already has an account, their existing account, including their Word Lists, Students, and results, moves onto your School plan. They’ll get an email letting them know.
Teachers you add are never School Admins. To give another staff member School Admin access, email us.
Bulk adding teachers from a CSV file
To add many teachers at once:
- On the Teachers tab, click Bulk Add Teachers from CSV list.
- Choose a CSV file (up to 10MB) and click Next.
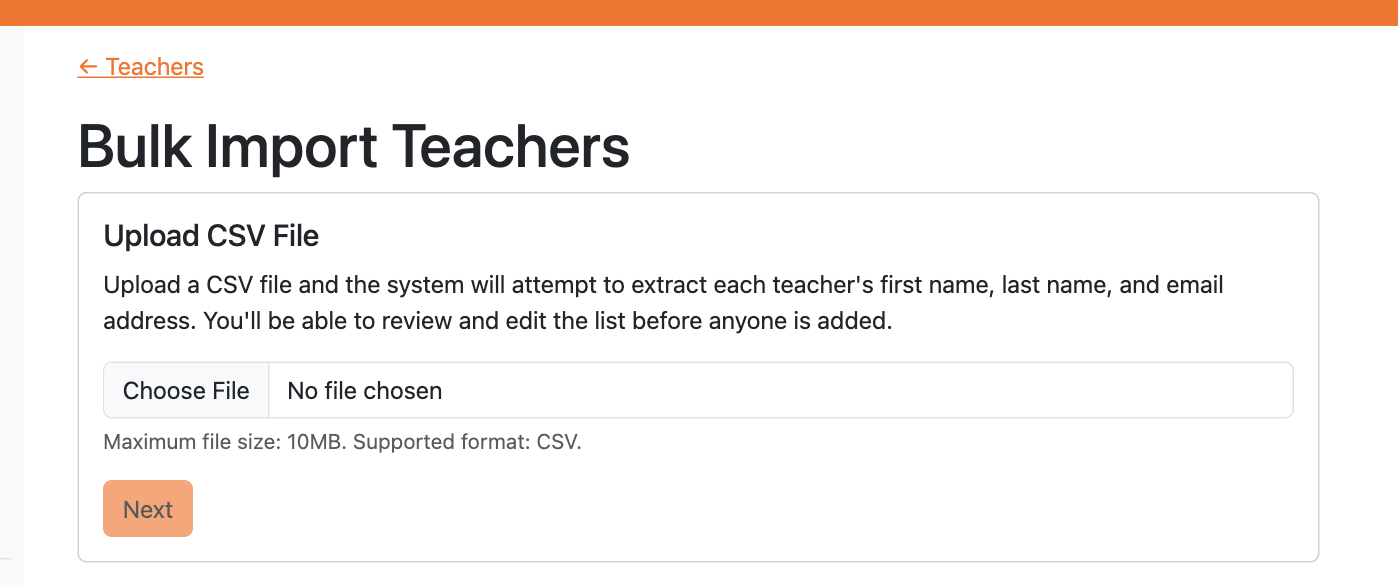
The file doesn’t need a special layout. We’ll find each teacher’s first name, last name, and email address, even if names are in one column (like “Lopez, Grace”) or the file has extra columns.
- Review the list. You can fix any name or email, or click Remove to skip a row.
- Click Add Teachers.
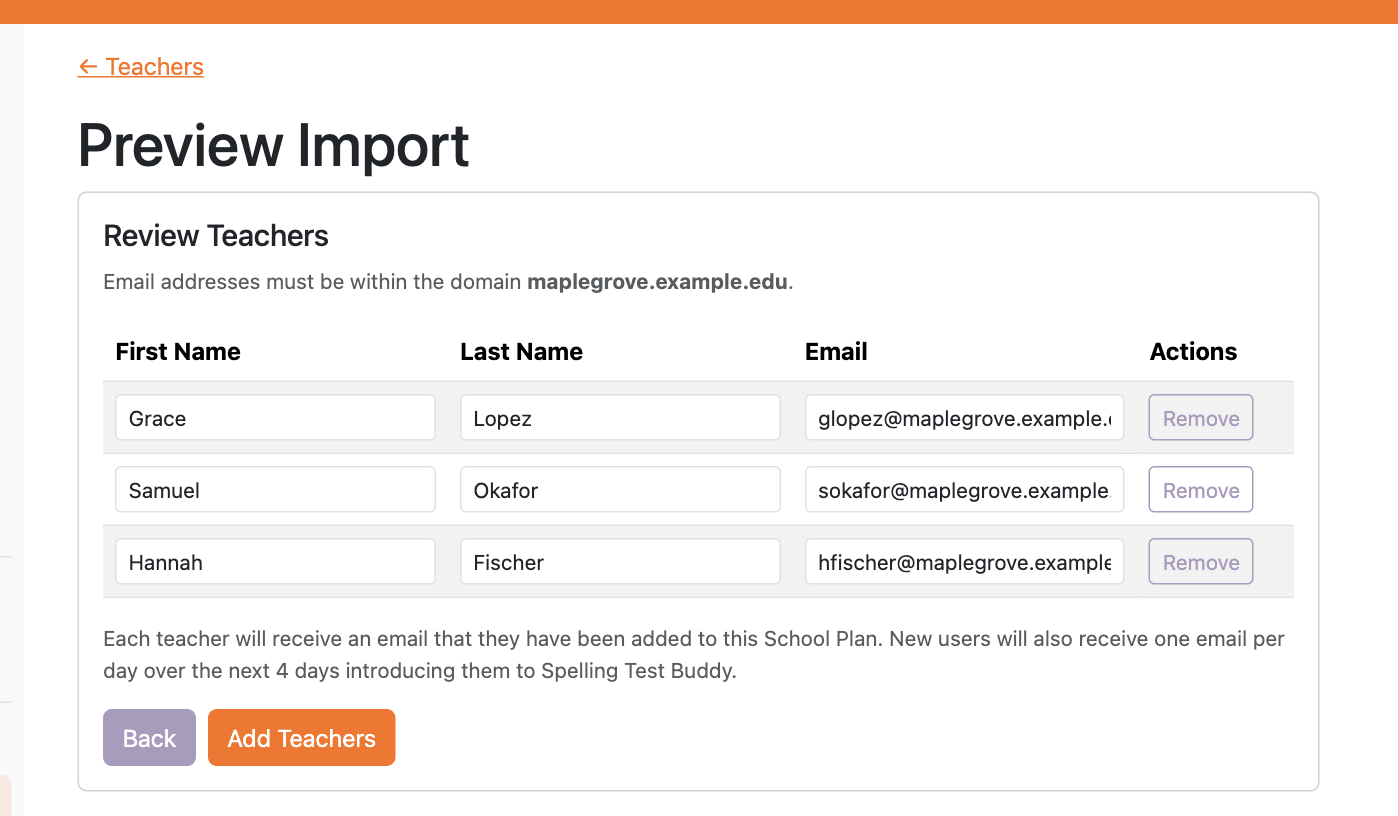
You’ll then see the results for each row. If a teacher couldn’t be added, the reason is shown next to their name, for example if their email is outside your school’s domain, they’re already on your School plan, or you’ve run out of licensed seats. Each teacher who is added gets the same emails as when you add them one at a time.
Removing a teacher
On the Teachers tab, click Remove next to the teacher and confirm.
Removing a teacher takes them off your School plan, but does not delete their account. They keep their Word Lists, Students, and results. You can’t remove yourself.
Groups
The Groups tab is where you set up school-wide groups, such as a homeroom, a grade, or an intervention group.
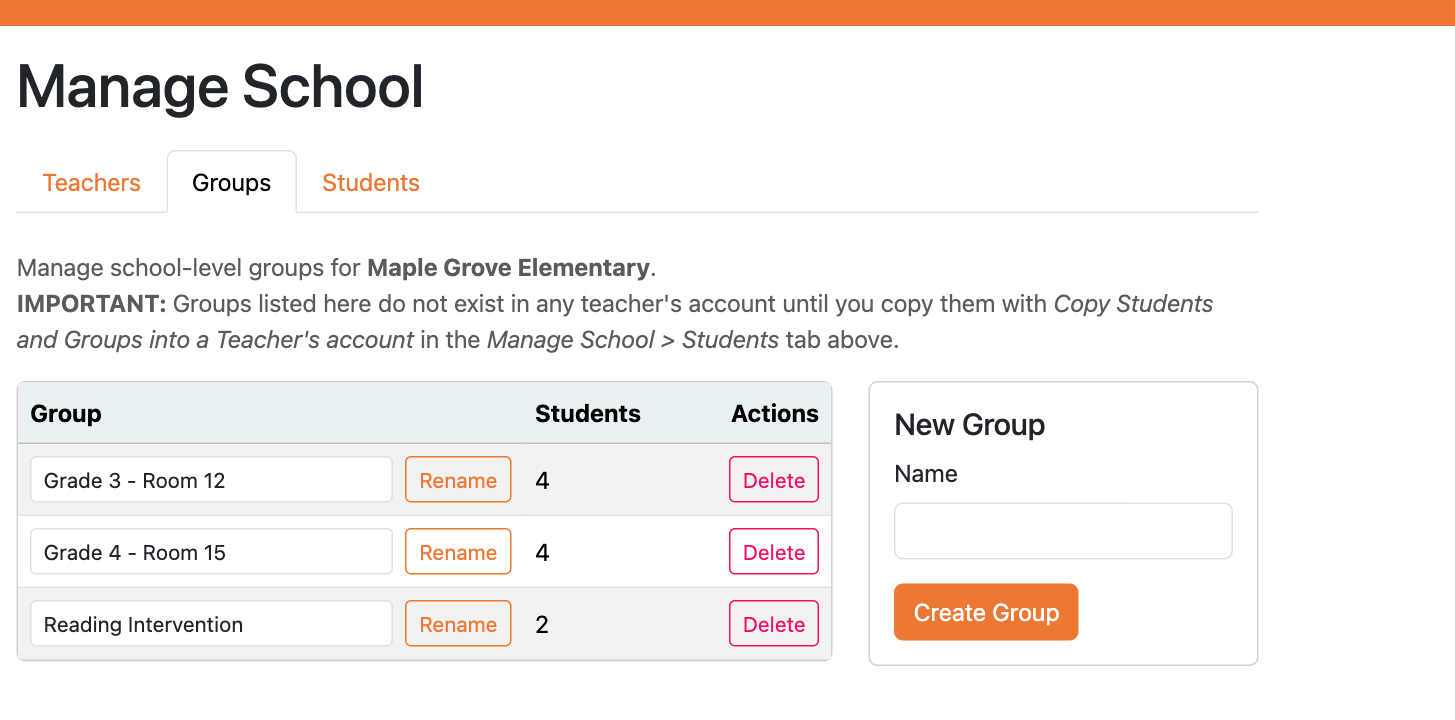
- To create a group, type a name under New Group and click Create Group.
- To rename a group, edit its name in the list and click Rename.
- To delete a group, click Delete. Any students in it become unassigned. Students aren’t deleted.
The Students column shows how many school students are in each group.
Important: School groups don’t appear in any teacher’s account until you copy them in. See Copying Students and Groups into a Teacher’s account.
Students
The Students tab is your school-wide student roster. Here you can add, import, and organize students before handing them out to teachers.
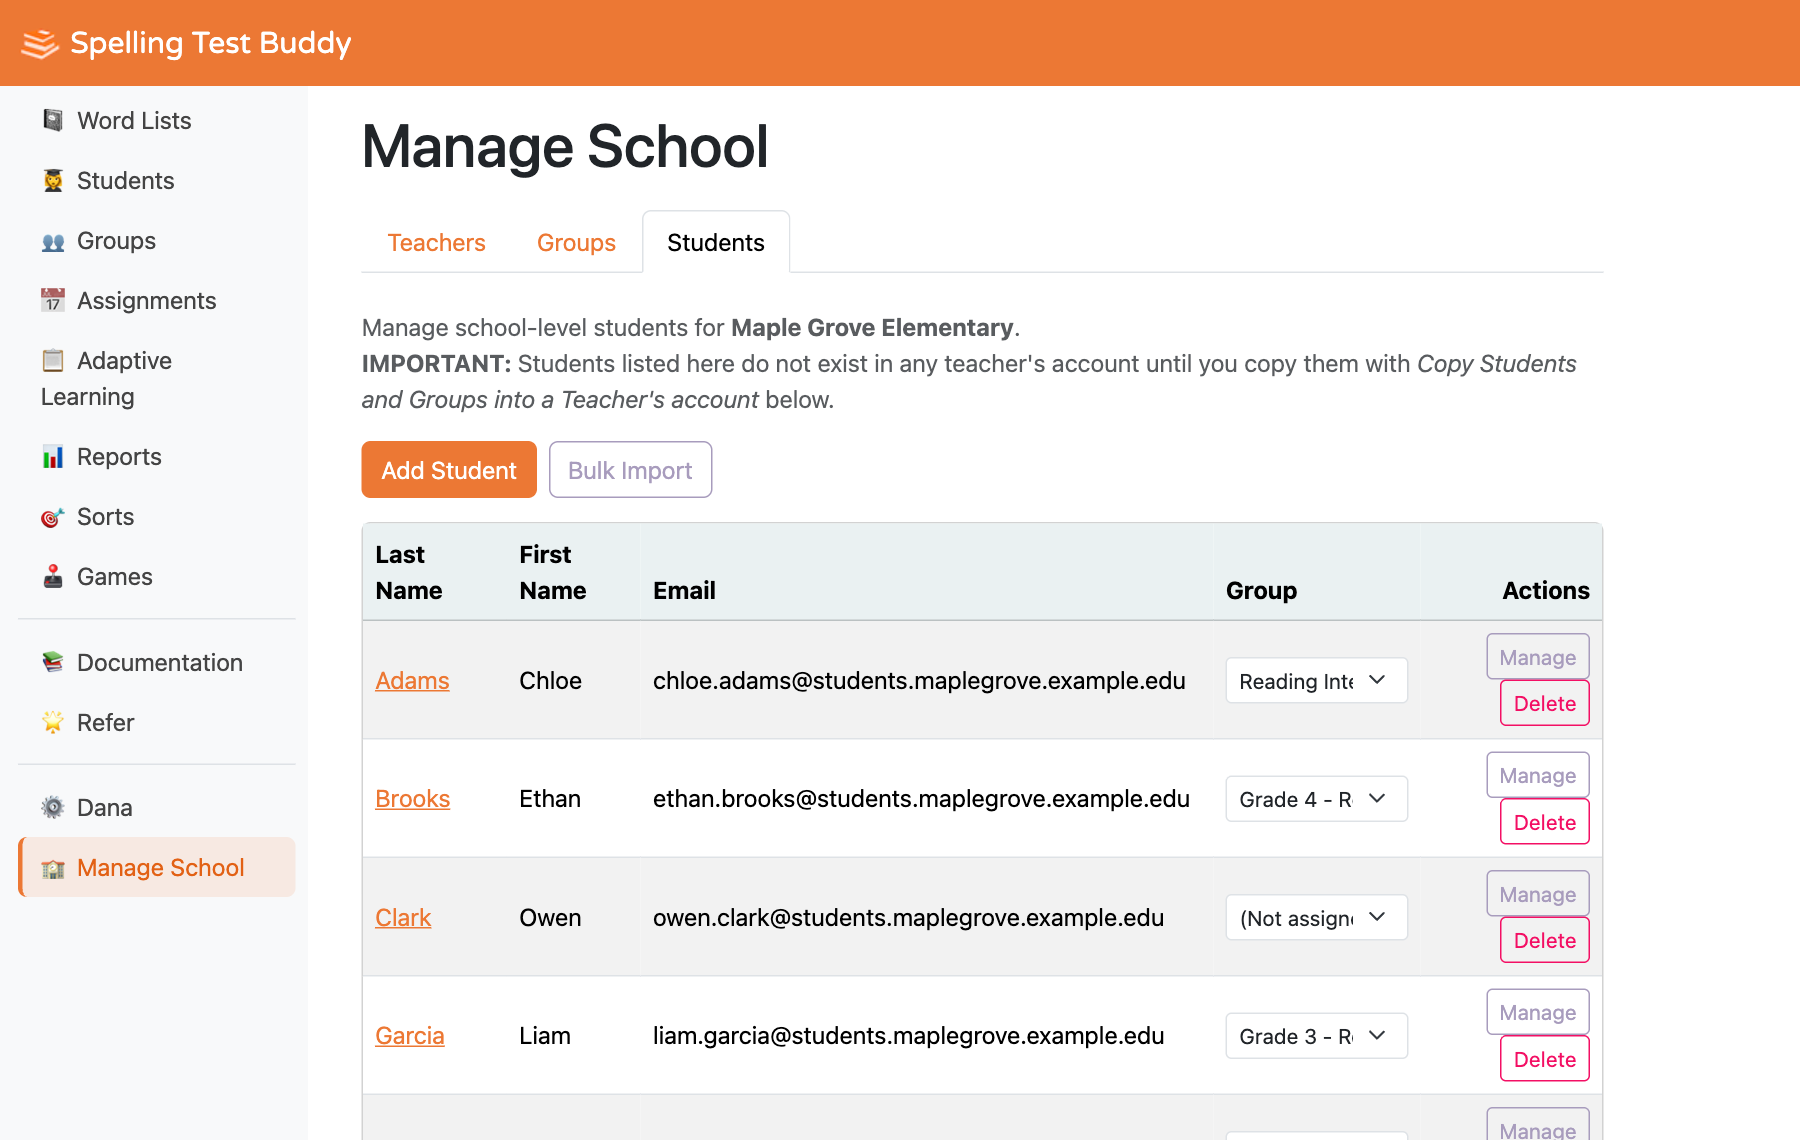
Important: Like school groups, students listed here don’t appear in any teacher’s account until you copy them in.
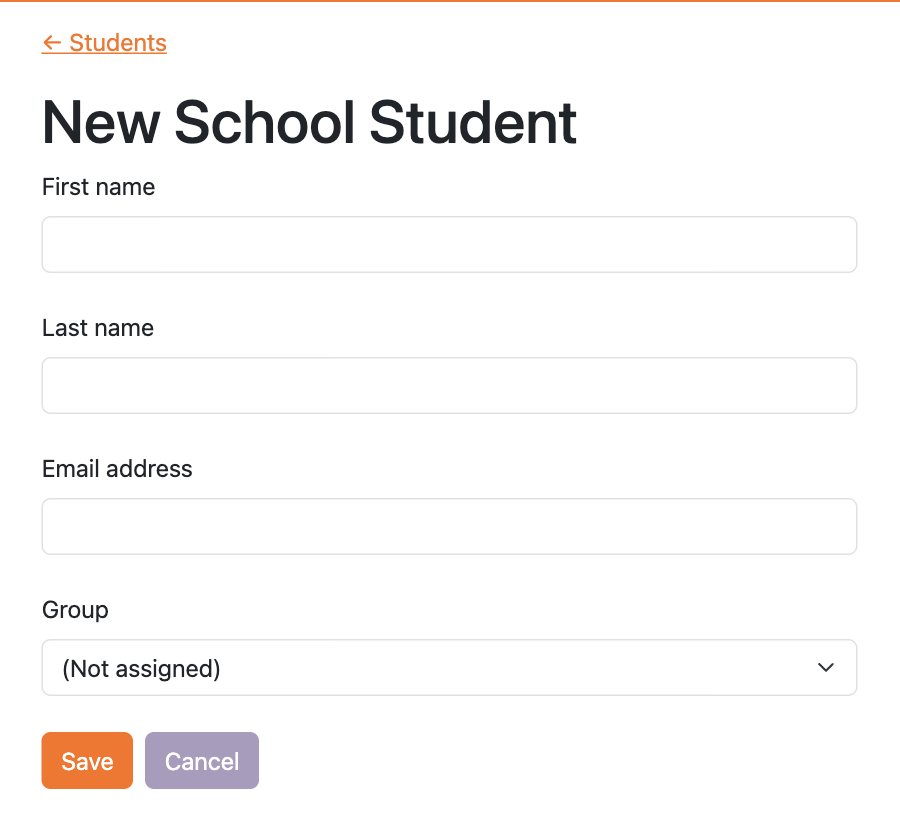
Adding a student
- On the Students tab, click Add Student.
- Enter the student’s first and last name. Email address is optional.
- Optionally, choose a Group.
- Click Save.
Bulk importing students from a CSV file
- On the Students tab, click Bulk Import.
- Choose a CSV file (up to 10MB) and click Next. As with teachers, the file can be in almost any layout. We’ll pick out each student’s first and last name.
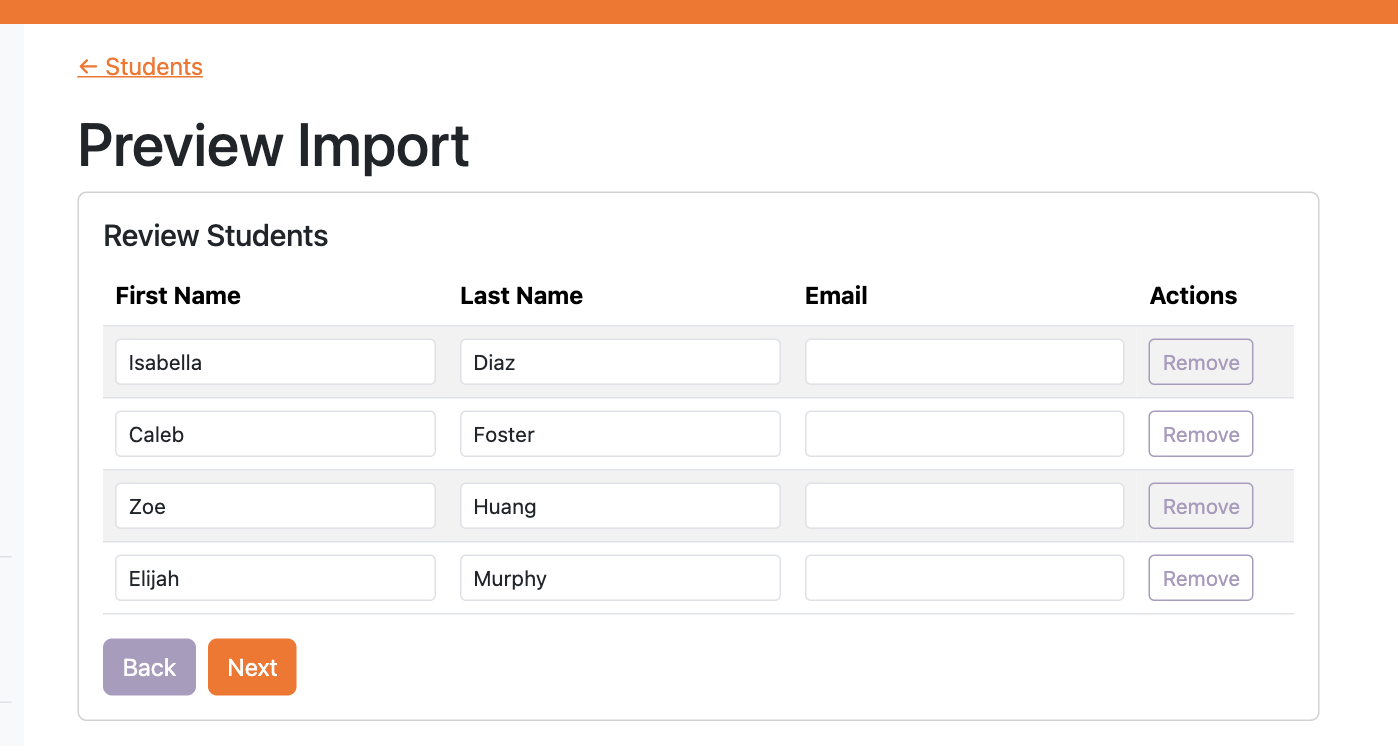
- Review the list. Fix any names, or click Remove to skip a row. Then click Next.
- Optionally, choose a school group to put all of these students in. Then click Import.
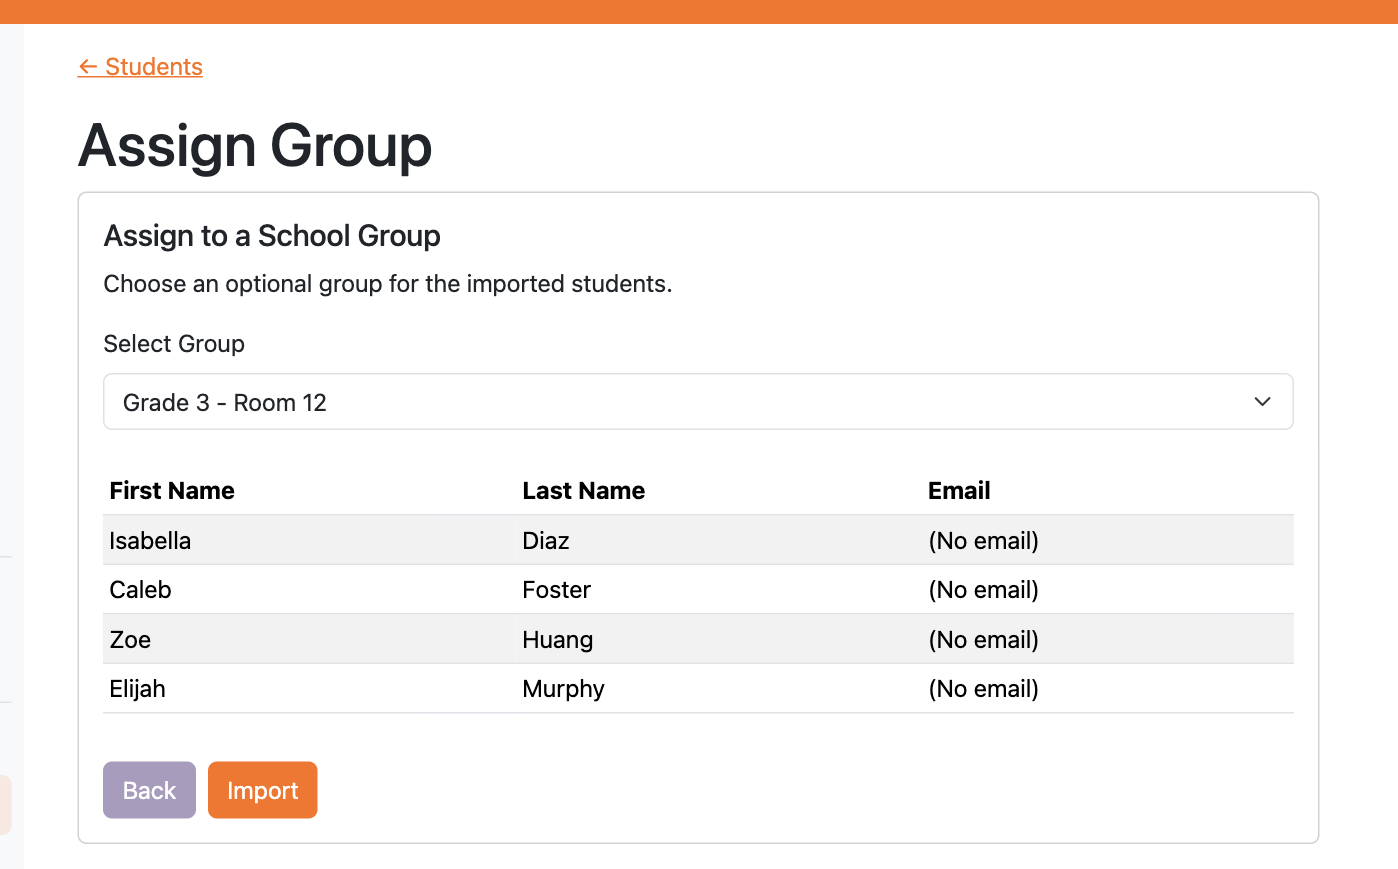
Tip: If you’re importing several classes, import one class at a time so you can put each one in its own group.
Editing, regrouping, and deleting students
From the student list you can:
- Change a student’s group by picking a different group from the dropdown in their row. It saves right away.
- Edit a student’s name, email, or group by clicking their last name or Manage.
- Delete a student by clicking Delete and confirming.
Copying Students and Groups into a Teacher’s account
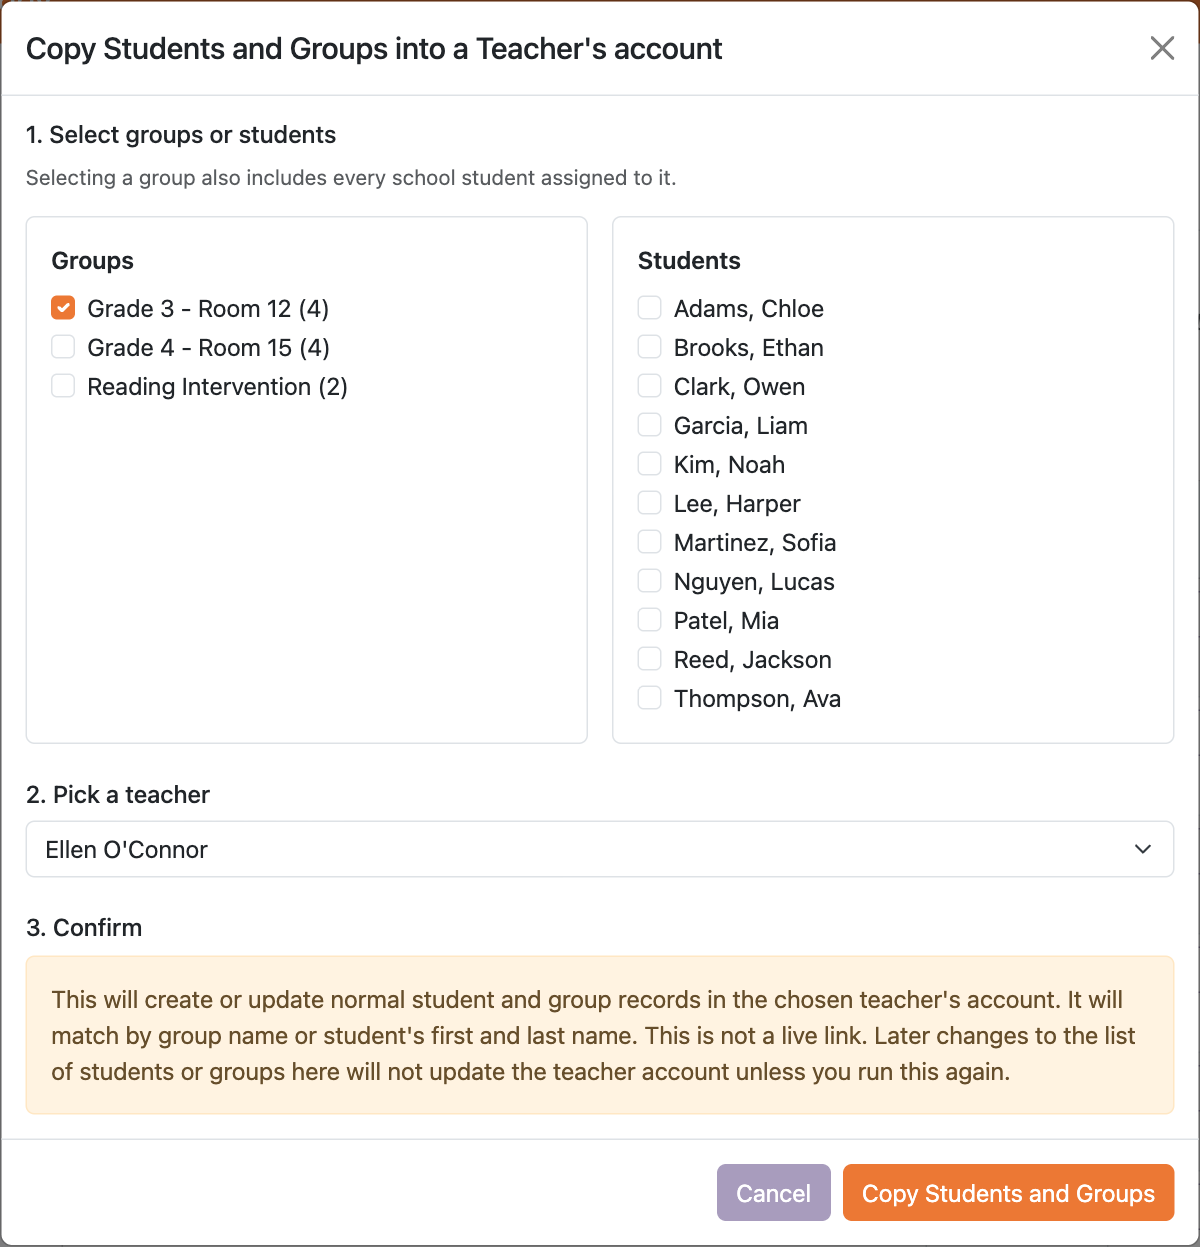
When your roster is ready, copy students and groups into each teacher’s account. This is what makes them show up on the teacher’s own Students and Groups pages.
- On the Students tab, scroll down and click Copy Students and Groups into a Teacher’s account.
- Select groups or students. Check any groups, any individual students, or both. Checking a group includes every student in it.
- Pick a teacher.
- Click Copy Students and Groups.
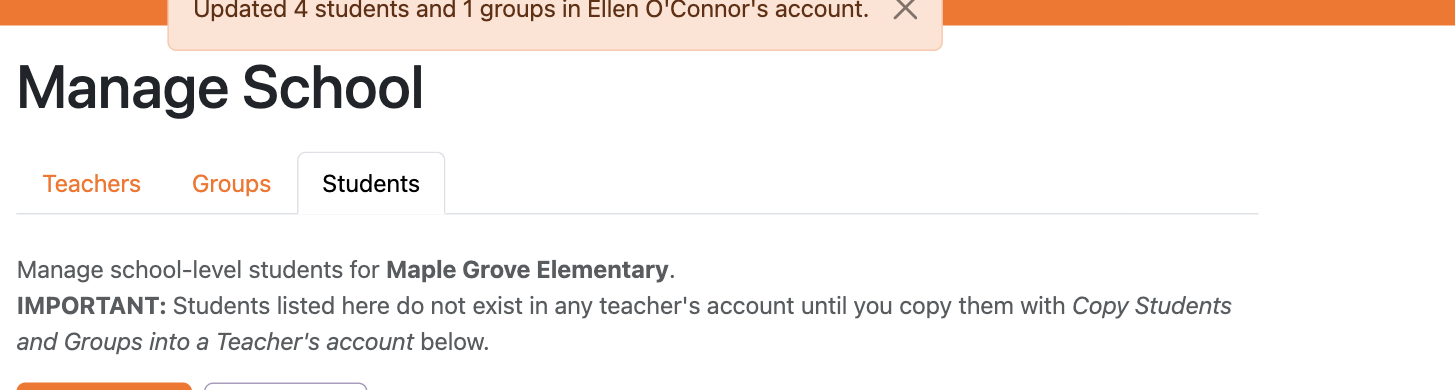
You’ll see a message with how many students and groups were added or updated in that teacher’s account:
How copying works:
- It creates or updates. If the teacher already has a group with the same name, or a student with the same first and last name, that record is updated instead of duplicated. You can safely copy again.
- Groups come along automatically. If you copy a student who is in a school group, that group is also created in the teacher’s account, and the student is placed in it.
- New students get a Student Code, made from their name, just like students a teacher adds themselves. Teachers can see each code on their Students page.
- It isn’t a live link. Later changes in Manage School don’t update the teacher’s account until you copy again. Changes the teacher makes in their own account don’t change your school roster.
- Each teacher gets their own copy. If you copy the same student to two teachers, such as a classroom teacher and a reading specialist, each teacher has a separate record with its own Student Code and results.
What teachers see
Teachers on your School plan use Spelling Test Buddy the same way as any teacher. After you copy students and groups to a teacher:
- The students appear on the teacher’s Students page, each with a Student Code.
- The groups appear on the teacher’s Groups page.
- The teacher can then make Word Lists, assign tests, and track progress as usual.
Teachers can still add, edit, and remove their own students and groups. See Students and Groups.
Troubleshooting
“The email address must be within the domain…” Your School plan only allows teachers with your school’s email domain. Check the email address for typos. If a teacher needs to use a different domain, email us.
"…has reached its limit of … licensed teacher(s)." Every seat on your plan is in use. Remove a teacher who no longer needs access, or email us to add seats.
"… is already a member of …" That teacher is already on your School plan, so there’s nothing to do.
A teacher doesn’t see the students I copied. Check that you picked the right teacher in step 3 of the copy. Then ask the teacher to refresh their Students page.
I see duplicate students in a teacher’s account. Copying matches students by exact first and last name. If a name was spelled differently in the teacher’s account (for example “Katie” vs. “Katherine”), a new student is created. The teacher can delete the extra student from their Students page.
Need help with anything else? Email us at support@spellingtestbuddy.com.